Wednesday, September 25, 2013

Finished!

   When I started this blog 4 months ago it was my intention to post weekly updates on the construction of the guitar. I've worked on the guitar whenever I could but somehow the blogging took a left turn towards Slackerville. I'm sorry. However I'm happy (and a little sad) to report that Tailgate Guitar is finished!

I really wasn't sure how it would turn out. I had limited experience woodworking and zero experience building guitars so I leaned heavily on the experience of others. A virtual thank you and handshake to Steve Dickey, Jon Sevy, and Robert O'Brien. These guys have all generously shared their experience through blogs and videos. If you've stumbled upon this blog because you want to build a guitar I hope that you find something helpful but be sure to google these guys. They're the pros.

A few facts about Tailgate Guitar:
There is an ant forever embedded in the glue that secures the internal bracing. I did build this outside.
The guitar contains my dna thanks to a misguided chisel that found the end of my finger.
There are well over 200 pieces of wood in the guitar including Mahogany and Rosewood from S.America, Purple Heart from Mexico, and Black Walnut from Illinois.

I'm adding a few more pictures and a link to my son, Dave, playing the guitar. I gave Dave his first guitar 13 years ago, the same guitar that I used as a guide for Tailgate Guitar. Thanks for sticking with it, Dave. You make me proud. Thanks also to my family, especially Kelley, Lawton, and Shannon for all your encouragement. You helped make this a fun project. I love you all.

Tailgate Guitar is not perfect. It has flaws that I haven't mentioned, mostly cosmetic. I love it anyway. I think whenever the potter puts his hand to the clay that a bond is formed. God created us and He loves us in spite of our imperfections. A much grander scenario, I know, but there are some parallels. The guitar can not love me back. It is wood and metal. But in the hands of a musician it can make music. It feels good having been a part of that.
Thank you for reading.

I didn't want to cover the design with a traditional bridge so I made this one.
 
Bridge installed
 
My spray booth. I used lacquer from a can.
 
It started with this black walnut
 
finally
 
Finished!
 
 
Dave plays Tailgate Guitar


Thursday, August 15, 2013

The Neck

It's been a month or more since my last post in Tailgate Guitar. I've been building but not writing. The guitar is almost finished but todays post is about the neck and related components.

The neck supports the tuners, the fret board, and the truss rod. The neck construction required a lot of measuring and shaping. Most of the research I did showed builders using chisels and shavers to carve the neck. I tried using chisels and a spokeshave but ultimately most of tailgate guitar's neck was shaped on a belt sander. I just liked it better. The neck began when I found an old piece of crown molding leaning against the wall in my mother's garage. It had obviously been there for years and it looked like mahogany. I took it home, cut the length in half, then glued the flat sides back together with a strip of purple heart (a naturally purple colored wood) in the middle. Now it's half the length and twice the width and measured out just right. I had a block of walnut that I wanted to use for the heel and the peghead so I cut appropriate sized pieces and clamped and glued them to the mahogany.

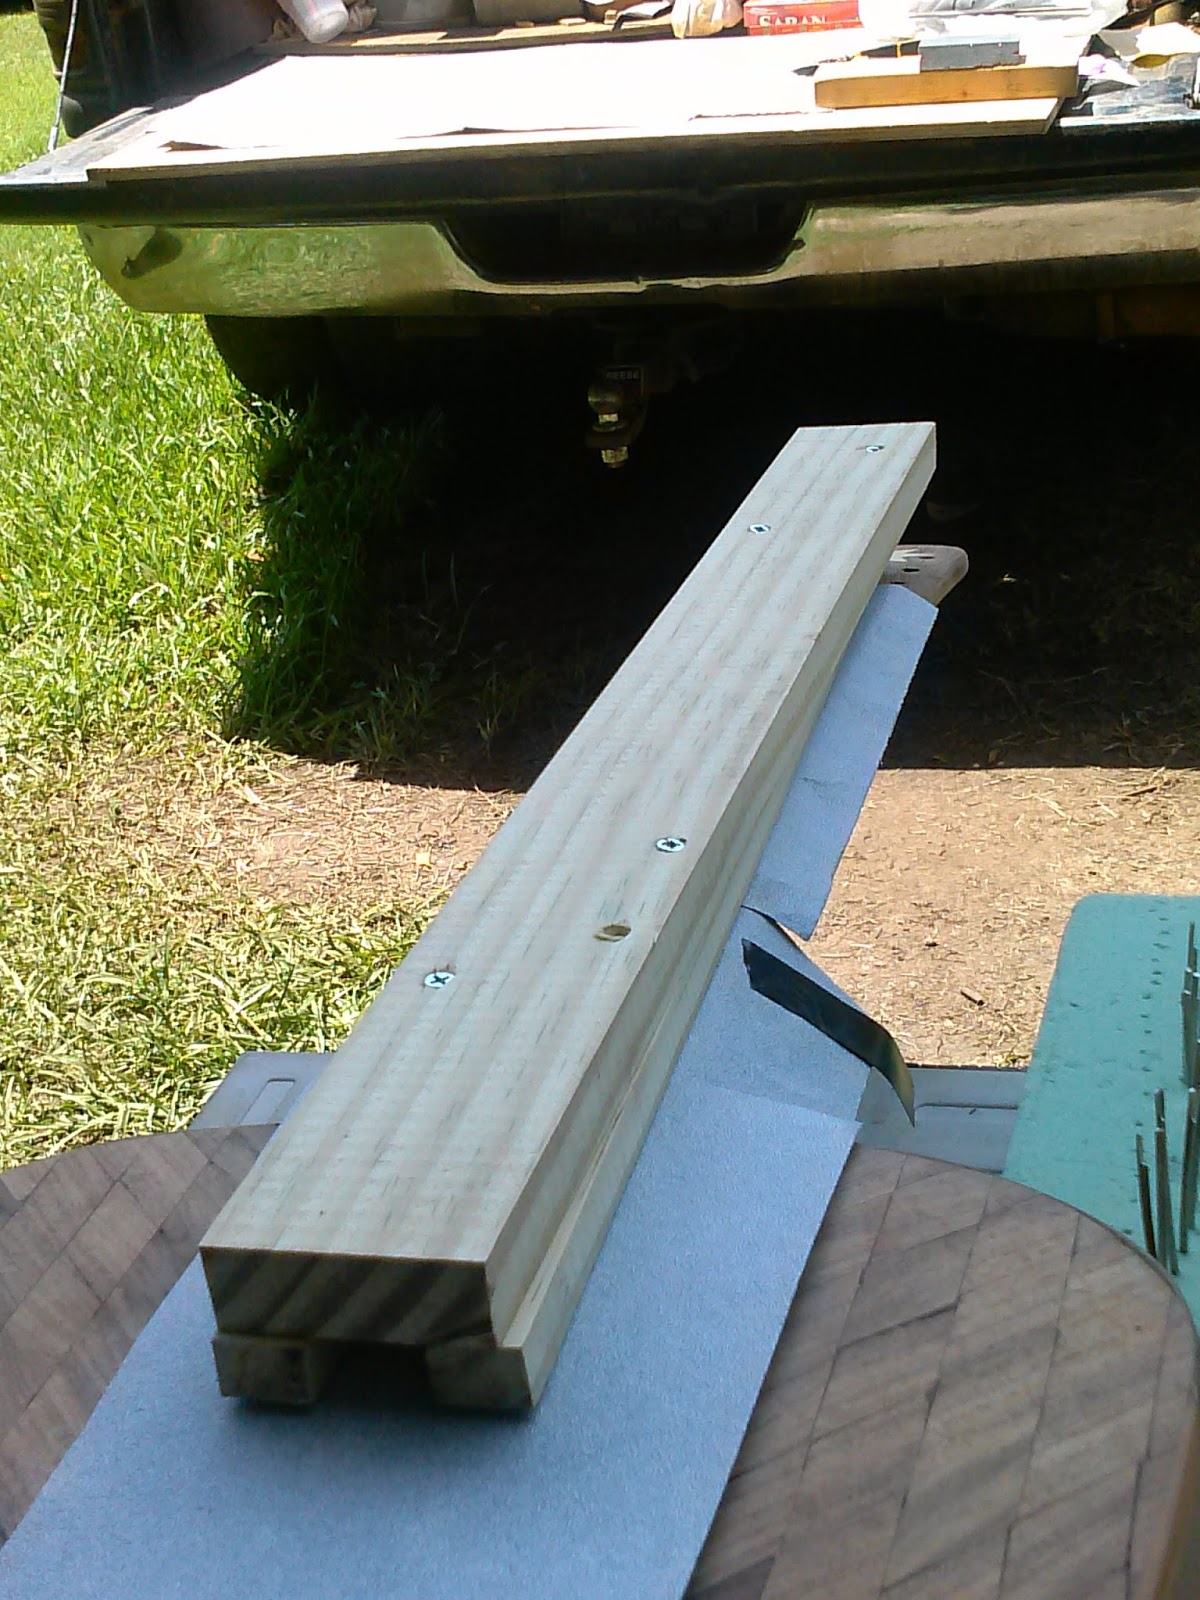
I decided to build a bolt on neck rather than a dovetail joint so that future removal would be easier if ever necessary. This required a mortise and tenon joint that I created with the table saw. This is the first time that I've ever done anything like this. I didn't know what a mortise and tenon joint was. That's one of the reasons why I've enjoyed this project so much. Learning is fun.

I'd never heard of a truss rod before, either. I now know that most stringed instruments have them. That's because the strings exert a lot of tension on the neck, somewhere around 150 pounds of pressure. So... steel truss rods are imbedded in the neck to counteract this force. If you look inside the sound hole of your acoustic guitar you will probably see the end of your truss rod. It should have a hex head so that you can use an allen wrench to adjust it. Or... the adjustment end might be under a small cover found on the peghead right behind the nut. The idea is that over time the strings pull the peghead up towards the body of the guitar, creating too much space between the strings and the fret board. The truss rod can be adjusted to bring it back.

The fret board is easily the most critical part of the neck. The frets must be located properly or the guitar won't play in tune. Fortunately, smarter people have already figured this out. I found a fret placement calculator at stewmac.com, a luthier supply company. They tell you the correct distance from the nut to each fret, all 20 of them, to the 1/1000 of an inch. I could only measure to 1/64 of an inch so I did the best I could and double checked the placement by comparing it to my old guitar. The quality of my work will be made known after I string this thing up for the first time. Which shouldn't be too much longer.

two pieces of mahogany and a strip of purple heart will become the neck


I found these bolts and barrel nuts in the furniture
 hardware section at the hardware store
 
 
the mortise and tenon joint
 
using the router table to cut the groove for the truss rod
 
 
truss rod installed in the neck
 
 
This piece of wood will be the clamping caul for the frets. The fret board is not flat, it is radiused so I placed sandpaper over it and ran the caul back and forth until it had a corresponding radius. This is important because I'm installing the frets with epoxy and I will need even clamping pressure.
 
 
frets lined up and ready to be installed
 
 
painters tape will keep epoxy squeeze out off of the fret board
 
 
I wanted to inlay a star in the peghead to complement the design in the body
 
 
I used electricians tape on a 1/8" drill bit to mark the proper depth,
then took out as much wood as I could
 
 
a chisel and exacto knife did the rest
 
 
the star glued in place and sanded flush
 
 
I also inlaid diamonds cut from poplar in the purple heart fret board.
Most fret boards are made from ebony or rosewood, but I didn't have any.
A wood hardness chart showed purple heart
 to be equal in hardness to rosewood which was cool because the
 purple heart worked perfect for the overall design.


Friday, June 28, 2013

Vanilla vs Chocolate Fudge with a river of Caramel

Vanilla is good. It may be the best selling flavor of ice cream. But it is still plain vanilla. I went into a guitar store a few weeks ago and looked at all the acoustic guitars. To my untrained eye most of them look  basically alike. Several had tops light in color, probably because spruce seems to be the most popular wood choice. I will admit that a knowledgeable guitar person would be able to see and explain all the differences between a beginners guitar and a high end guitar but at first glance to a novice they pretty much look the same.

I didn't want a vanilla guitar. I want chocolate fudge with a river of caramel. I want a guitar that anyone can see is different, maybe even special. So I broke the rules. Conventional guitar building wisdom says that you choose a hardwood known for its ability to transmit sound. A "tonewood", like the spruce  I mentioned earlier. You build the top with one large piece, or maybe two halves put together. For better or worse, I learned this after I had started my project. Tailgate guitar will have a top built with about 200 pieces of hardwood put together in a design inspired by the quilt pattern "Carpenter's Wheel". When I first showed it to my wife she said" I've never seen one like that before" and I replied with a quote from young George Bailey..."Of course you never!...only us explorers have seen it!" She quickly replied with Old Man Potter's "starry eyed dreamer..."(It's a Wonderful Life is our favorite movie). I probably am more of a dreamer than an explorer but in the end I will have a unique guitar, and that's what I wanted.
I thought it would be cool to sign it
 before putting the body together

I used tie down straps and the shaping form 
to clamp the body pieces together

not everything fit just right but subsequent routing
for the binding will fix this

The back turned out really nice

The top, or "soundboard"

I used my table router to cut the groove for the binding.
I fastened a castor wheel to the fence to keep
the depth of cut consistent all around the body.

The unfinished neck isn't attached yet, it's only there for the picture.
 Look closely and you can see the top overhangs the sides in places.
This picture was taken before the routing in the picture above.
It will all come together after the binding is installed.

Monday, June 17, 2013

Little Things

Miriam Webster defines "kerf" as the width of cut made by a saw or cutting torch. What does that have to do with guitar building? It seems that all acoustic guitars have an important component called a kerfing strip. If you look inside an acoustic guitar you will see the kerfing strip running along the perimeter where the top and bottom are attached to the sides. The strip is just a length of wood with a series of perpendicular cuts that only cut through about 90% of the thickness. The end result is a flexible, continuous piece of wood. The kerfing strips are glued to the tops and bottoms of the guitar sides and they become the surface to which the guitar top (soundboard) and back are glued to. I'm calling this post "Little Things" because kerfing strips are an unseen yet critical component of an acoustic guitar, and something that I, and probably you, have never thought about before this project.

Kerfing strips are available for purchase at luthier supply houses but I saw enough pictures to convince myself that I could make my own. After all, I do own the cheapest state of the art table saw that Home Depot had to offer. Standard kerfing strips are installed with the solid edge glued to the guitar side and the slotted edge visible from the inside. I decided to reverse that because Michael Obrien of Obrien Guitars said that would be cool in one of his nifty luthier instructional videos on youtube. It probably makes no difference. I did make a mistake here that caused some concern. I really should have glued both sides together with the end blocks before installing the kerfing. Instead I installed the kerfing on each side before the sides were together. Little did I know that the kerfing would pull some of the curve back out of the sides, and add strength as well. Now I have two sides that don't quite fit and they don't bend as easily as before. While I was gently persuading the sides back into the shaping form I heard the dreaded "craaack!" of wood breaking. A cool sound at the ballpark...not so much during a woodworking project. A small crack appeared on one of the sides. Remember in my last post I said that tailgate guitar would have a lot of character, this is one of the reasons why. I have since repaired the crack and hopefully I'll be the only person who can find the flaw.

Up until now I've been making guitar parts. With the kerfing installed I can begin assembly. It's very encouraging to see tailgate guitar taking shape.


setting the depth of the cut  
 
 
you can just see the miter gauge on the left
which keeps the wood at a 90 degree angle to the blade.


It takes a lot of clamps to make sure there are no gaps


End blocks and top kerfing are done and ready
to accept the top of the guitar.


Thursday, June 6, 2013

Transformations

In order to change something from one form of matter to another it seems to me that various inputs need to be applied. In order for a tree to become a house it must first be cut down and taken to a sawmill where it will be cut into usable lumber. Then it must be delivered to skilled carpenters who will carry out the home construction.
In order for a tree to become a guitar it must follow a similar path until it gets to that last part. I suppose this piece of black walnut would have had an easier time becoming a guitar had it fallen into the hands of a skilled craftsman but instead it fell into the hands of an enthusiastic rookie. I have cut it where I shouldn’t have, I have sanded it too thin, and I have scorched it with too much heat. So far none of my mistakes have been catastrophic but let’s just say that the tailgate guitar is going to have plenty of character.

Other guitar builders have written that one of the most fun steps in the building process is bending the sides. That’s what I did this past week. It was fun. It was also a little anxiety producing because I really wanted to get it right and the opportunities to screw it up were numerous. I don’t want to waste any of this wood.

In order to transform a nice straight piece of wood into a beautiful, curvy side to an acoustic guitar you have to apply heat, moisture, and pressure. Some people say the wood should soak awhile before you start, others say a light spritzing is all you need. I went with the garden hose method. After all, I’m building this guitar in the backyard on the tailgate of my truck and there’s a hose handy. First I wet the wood, then I wrapped it in aluminum foil, and then I applied the heat. I started to buy a little propane torch for the heat source but my imagination showed me several scenarios of potential disaster so I bought an electric heat gun instead. Heat guns are used to remove paint and wallpaper and now to heat up metal pipes for guitar builders. It’s really a blow dryer on steroids.
The heat gun blows hot air into the pipe, which in turn becomes quite hot. The wrapped up wood rests on the pipe at the spot that needs bending. When the wood reaches the correct temperature it becomes pliable and the transformation begins. After the bend is pretty close I put the wood on the shaping form that I made earlier and clamp it. This process continues until the whole side is shaped like I want it. I didn’t get it perfect but it’s close. I practiced a little ahead of time and I’m glad that I did because there’s definitely a learning curve. It’s starting to look like a guitar.
                                               
                                                            the side bending apparatus


first try on a piece of scrap wood

I'm getting smarter here. I wrapped the wood in wet rags
then in foil before I started heating. Results improved dramatically.

see the shadow in the waist on the one on the left?
that's a scorch mark from staying in one place too long

This is the large end of both sides. They will come
together at dead center. Notice how the grain lines up. Pretty cool!

Here I'm test fitting the top to the side and marking it with a pencil.
Remember the top has a slight arch so I can't just leave the edges flat.

Trimming away the excess with a coping saw.
This is a day or two after the bending and
I'm using the pipe for support, it's not hot.

Wednesday, May 29, 2013

Guide needed

When your journey takes you through unknown territory it is easy to become frustrated, disappointed, and maybe even hopeless. You can suffer through and learn from your own mistakes or you could make things a little easier by employing a guide, someone or something that knows the way. First time guitar building isn’t nuclear physics but it is challenging. I’ve been reading whatever I can find on the web and I’ve watched a few youtube videos. Most of the information is helpful but of course there’s a ton that doesn’t really apply. My favorite acoustic guitar building website so far is authored by J. Sevy and can be found here http://gicl.cs.drexel.edu/people/sevy/luthierie/guitarmaking_guide/building_flattop.html .

My old guitar has a flat top and a rounded bottom, kind of like an old girlfriend from way back when and also pretty much like every other acoustic guitar I’ve seen. I want the tailgate guitar to be a little different so I’m taking inspiration from Mr. Sevy and I’m going to build my guitar with an arched top. I figure a little extra effort will make the tailgate guitar nearly perfect, kind of like my wife... I don’t know what kind of math it takes to figure out lengths of ellipticals, curves, domes etc. so I applied the KISS theory and built a guide . A template to help get the arch right. I started by gluing together the guitar back pieces. Since the back is thin and somewhat flexible and the correct width I held it’s edge against a board and tweaked it with my hands just a bit to create a long gentle curve. Then I marked the curve with a pencil and used a jigsaw to cut it out. Now I have a board to serve as a template to guide me in constructing the internal bracing for the top of the tailgate guitar. If the bracing has the correct arch, so will the top. I simply held the guide against the bracing that I had already built and sanded down the high spots until the whole thing matched the guide. Of course this is required along the whole length of the brace.

Other guides that I will need and have built are the side bending form and the body outline form. There’s no way that you can “eyeball” this stuff.

Guides are good. I like guides.

“Thy word is a lamp to my feet and a light to my path”
Psalm 119:105


I used a jigsaw to cut out the curve.
This just became my guide to help me get the
 internal brace arching just right.


Chuck.

2 pieces of the black walnut cut to the proper
length and glued together. Imagine each half
          as pages in a book. If you flip one so that it
covers the other they will be in the same position
that they grew in the tree. I "turned" the page
 to create the lighter colored sapwood stripe
down the middle. I used the walnut as a guide
to draw the curve on the board below.


This is the body outline form placed
over the black walnut back.

The guide is placed on top of the brace
and I sanded down the high spots until all of the
contact points just touched the brace.


This is the form I will use to bend and shape
 the sides of Tailgate Guitar. Notice how it corresponds
to the body outline forms, which are just the pieces that fell off
when I cut out this shape.


Wednesday, May 22, 2013

Inspiration

What inspires you to do anything?
Maybe you see something really cool in a magazine or on-line and you want to try to do something similar. Maybe you have a strong desire to achieve some level of success and you'll do whatever it takes to get there. Maybe you have a want or need for something and you would rather build it than buy it. That's the category my current project falls in to.

I have decided to build an acoustic guitar. I don't need one. I don't know how to play one. I do know a few chords but I'm a long, long way from proficient. Carpal tunnel syndrome and subsequent surgery put an end to guitar lessons a few years ago but I'm healed now and I would like to try again. My guitar is a plain, old, no name acoustic that I gave to my son when he turned 13. He's 25 now. He went on to become an excellent guitar player and now has a very nice guitar. I hadn't seen my guitar for awhile so I asked my daughter if she knew where it was. I was pretty sure that one of her friends had borrowed it. Turned out it was in her room, in a soft case, but somehow the neck had been broken.  At first I thought it was beyond repair. I enjoy woodworking but the break was jagged  and I wasn't sure that the old guitar was worth the effort to fix it. After a few days of thinking it over I decided to use the old guitar for a pattern to build a new guitar. I went ahead and did my best to repair the old one with clamps and glue, mainly so I'd have an intact neck to measure. To my surprise, it seems to be holding up ok, but the idea to build a new one had incubated long enough so I'm going through with it.

There is quite a bit of information on-line related to building an acoustic guitar. It seems that lots of people have built one and blogged about their experience. I made a few decisions before I did any research and I now know that I've already made some mistakes. Regardless, I am determined to make this guitar one of a kind. It may not sound great, I may not be able to play it well, but I'm going to do my best to make it look good! Something tells me that this first guitar I'm building won't be the last guitar I build. I don't have a workshop. I have a pick-up truck. I'm building this guitar on the tailgate, hence the name "Tailgate Guitar". I have a few basic tools and a love for creativity. We'll see how it goes.


A trip to a local sawmill yielded 7 pieces.
these will become the back and sides.
This is enough wood for 2 guitars!

I found this piece of Black Walnut
at an exotic woods dealer in Atlanta.